
Lesson 1
In this lesson we looked at some of the UI in unity and the code and variables in a space shooter game.
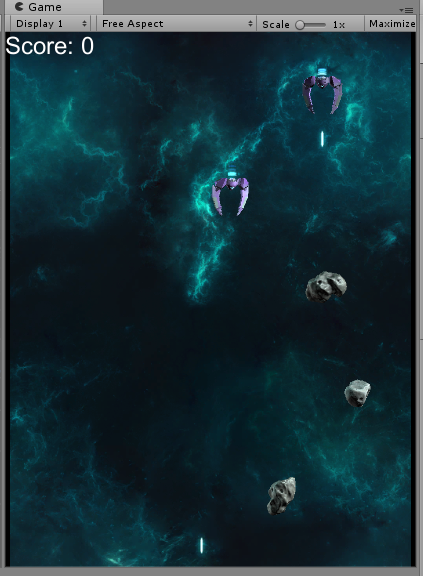
We first tried to find a variable which changes the velocity of the player and changed it. Once we did that we played the game to see how it worked. We then opened the script for the player movement and tried to find the speed function in the code.
This lesson gave me an idea of the use of variables in Unity to create shortcuts to certain things in scripts. This is a useful technique for me to use when I am programming.
Lesson 2
In this lesson we are looking at some coding examples.
First we looked at pseudocode examples to create our own pseudocode for the movement of a player.
Here is a basic example of how movement would look in pseudocode with some annotations that I added explaining how some of the function worked in the code:
1 function update_movement(delta_time)
2 if (left_key_is_pressed) – This sets a condition for an input from the user
3 speed_x = -SPEED – This sets speed_x to -SPEED
4 if (speed_y == 0)
5 facing = left – This checks to see if the character is facing left
6 else if (right_key_is_pressed) – Sets a new condition for an input from the user
7 speed_x = SPEED
8 if (speed_y == 0)
9 facing = right – Checks to see if the character is facing right
10 else
11 speed_x = 0 – Changes speed_x to 0
12 if (up_key_is_pressed) – Sets new condition for an input from the user
13 speed_y = SPEED – Changes speed_y to SPEED
14 if (speed_x == 0) – If the value of speed_x is equal to 0
15 facing = up – Checks to see if character is facing up
16 else if (down_key_is_pressed) – Sets a new condition for an input from the user
17 speed_y = -SPEED
18 if (speed_x == 0) – If the value of speed_x is equal to 0
19 facing = down – Checks to see if the character is facing down
20 else
21 speed_y = 0 – Sets speed_y to 0
22 position_x = position_x + speed_x * delta_time;
23 position_y = position_y + speed_y * delta_time;
We then used the example to create our own character movement pseudocode:
function playerMovement(delta_time)
If (right_key_is_pressed)
Speed_x = SPEED
If (speed_y==0)
Facing=right
If (left_key_is_pressed)
Speed_x = -SPEED
If (speed_y==0)
Facing=left
If (up_key_is_pressed)
Speed_y = SPEED
If (speed_x==0)
Facing=up
If (down_key_is_pressed)
Speed_y = -SPEED
If (speed_x==0)
Facing=down
Lesson 3
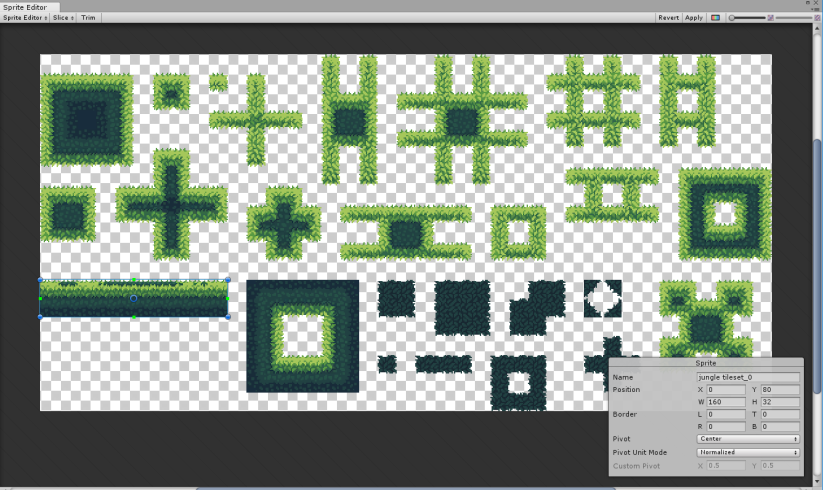
In this lesson we looked at adding simple movement code to a sprite in unity. First, we got a pre-made tile set for the sprite to run across and trimmed out the pieces we wanted and gave them a box collider so the player would land on them:
We then added the sprite and gave it a Rigid Body.

Next, we went onto visual studio to create a script for the movement.
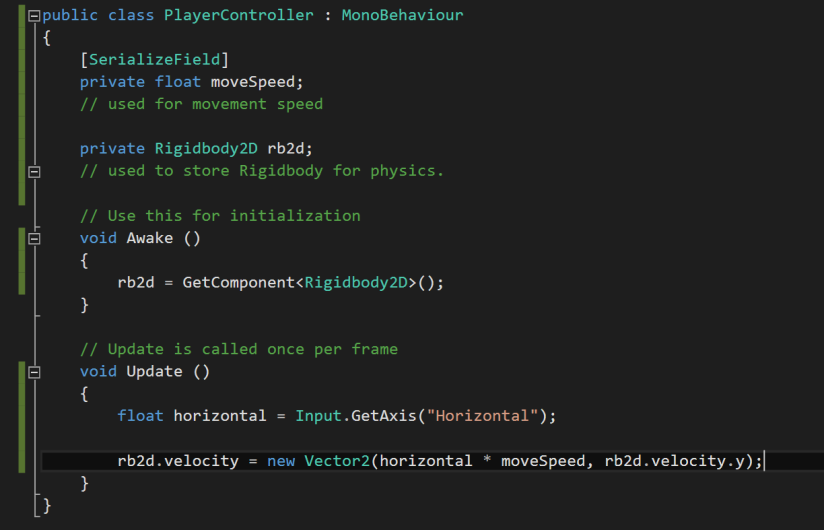
We made the movement speed editable in unity:

Next, we created the code for jumping and detecting the ground.
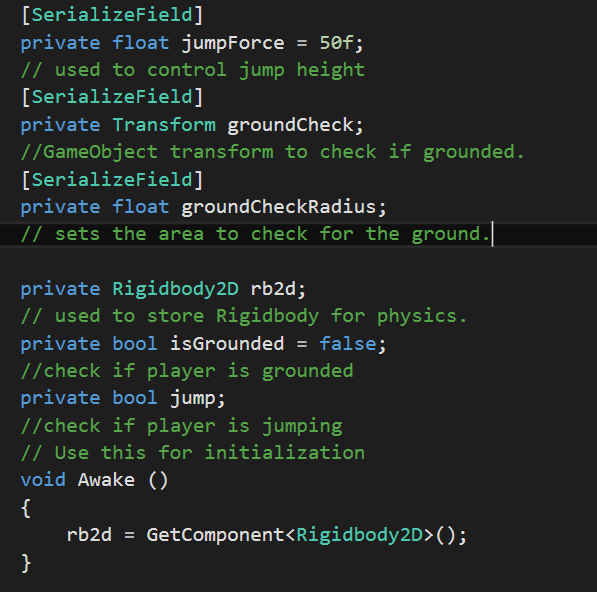
The ground detection code didnt work, so we went onto the jump force and will look into ground detection more next lesson.

We also made the jump force editable in unity.


Next we looked at examples of flowcharts from games to get an idea of how they work. Here is a good example I found for a game of noughts and crosses:

I like this loop structure:

This goes through the way the game checks for a win or loss.
Another good example I found was for a puzzle game:

List of flowchart symbols and what they are used for:

This list will be useful to refer to when creating flowcharts, although I would most likely only need to memorize a few of the important ones.
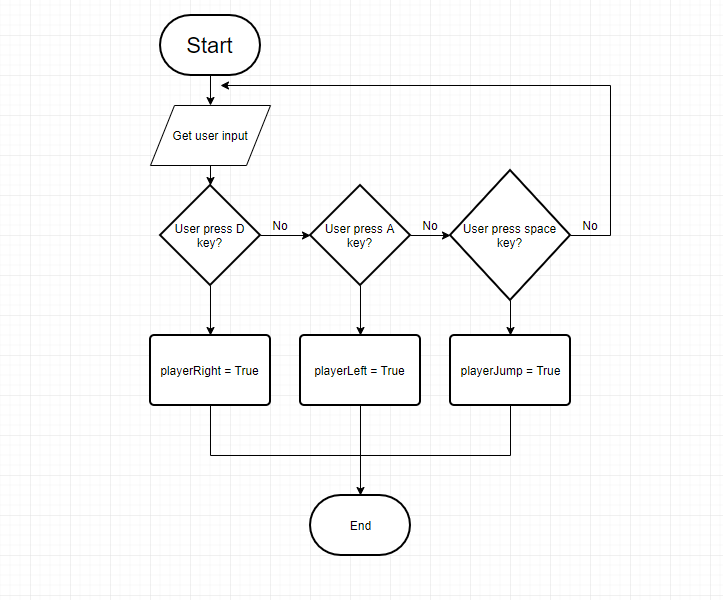
Using this research I created a flowchart for the movement of a player in draw.io:
Next lesson we will be looking at fixing the movement so that the player can only jump once until it hits the ground. For that the ground detection code needs to work.
Lesson 4
In this lesson we will be finishing off the movement code. First we tried to fix the ground detection code.


This code lets us know in the unity console whether or not the player is touching the ground, and disables jumping when the player isn’t touching the ground.

Lesson 5
In this lesson we will be looking at animation and collection. For a starter task we looked at some code and tried to find 13 bugs:


I will list as many of the 13 bugs in the code and the scene as I can find
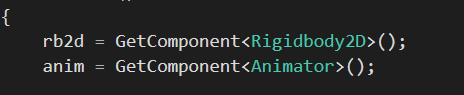
- Rigidbody was used in getComponent rather than Rigidbody2D
- Jump is declared with a lower case “j” but is used later on with an upper case “J”
- groundCheckRadius is declared as groundCheckRadios
- jumpForce set to 0
- movementSpeed set to 0
- lower case “g” on getMask
- Freeze rotation of player
- playerMovement set on x axis
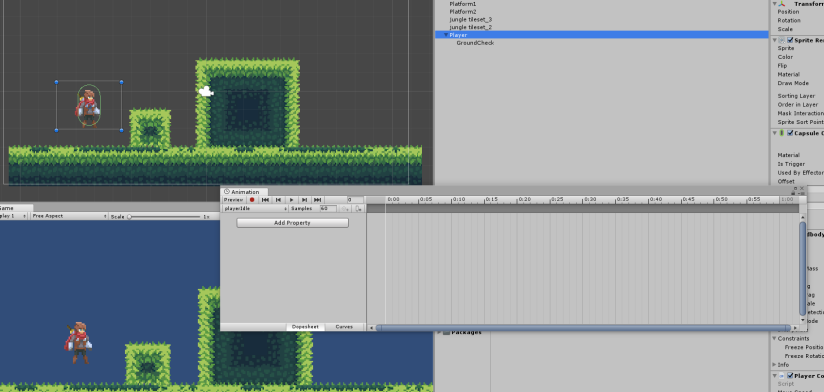
These were all I could find in the time given. Next we opened another project to create animations for a player. First we made the idle animation.

Then we did the jump and run animation and looked at adding them to the player using the animator.
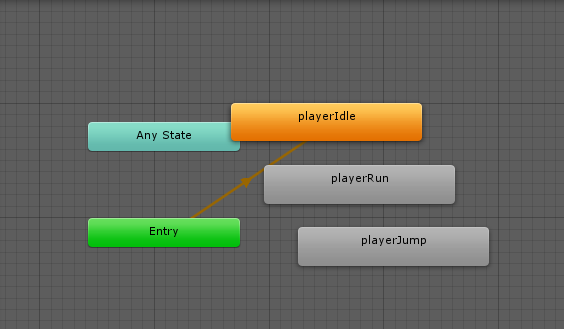
We rearranged the transitions between animations so they can flow properly in game.

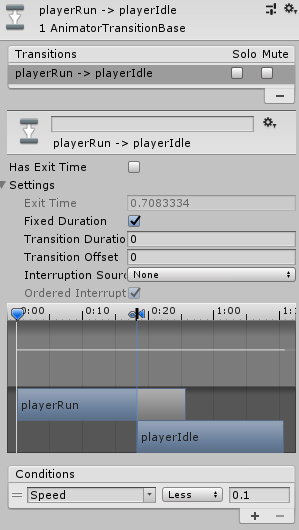
We then made a speed parameter to change how the animations flow.

For idle to run.

And run to idle.
Then we made some code to add the animations to the player:

This lesson was helpful as I learned how to add animations to a player and how to make them flow properly. These skills will be useful when I come to making and adding my own animations to characters in the future.
Lesson 6
For the starter task we reviewed animation from last lesson and looked at a unity project to identify and list 8 problems. These are the ones I found:
- animat is called in the getComponent rather than animator.
- idle – run
- when the left key is pressed the player faces right and vice versa.
- the running animation was sped up 4 times.
- run – idle
Next we made a list on pickups:
- Disappear when picked up
- Feedback(sound, win condition)
- Score Inventory
- Sprite Change
- Animation
- Collision
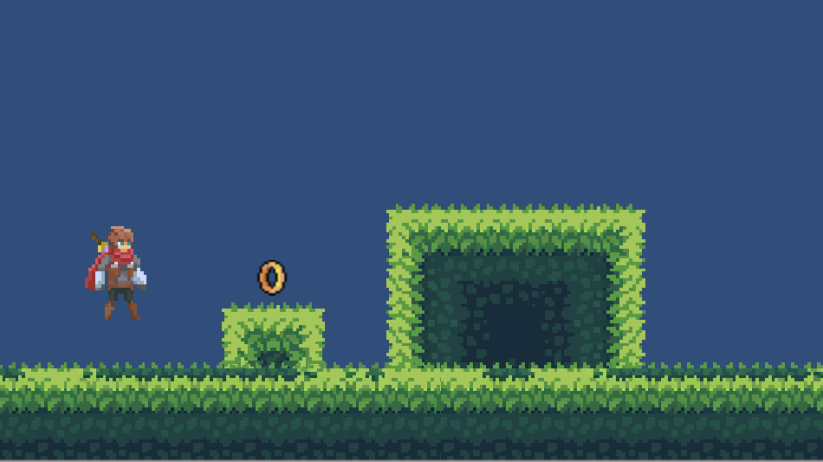
We then went to the project from last lesson and imported some collectibles into it:
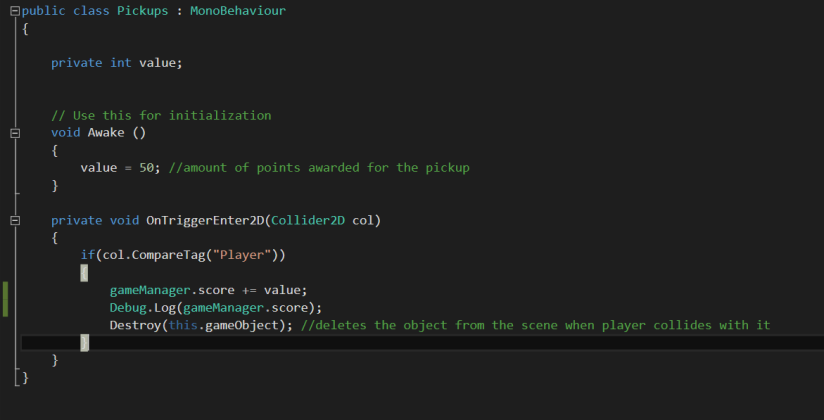
 We then made a pickups script to set up a points system and for the collectible to disappear.
Then we made a game manager script to set up a scoring system for each collectible picked up.

Next we researched instantiation and prefabs and how they can be used in unity and games programming.
Instantiation – the realization of a predefined object. In object-oriented programming (OOP), a class of object may be defined. All objects of this class have a certain set of properties (associated variables), accessories (ways to access those variables), and methods (functions). An instance of that object may then be declared, giving it a unique, named identity so that it may be used in the program.
Prefabs – in Unity, the prefab asset allows you to store an asset with all its properties inside the prefab, and the prefab acts basically as a template that you use to create new instances of the same object in the scene. For example, prefabs could be used for projectiles, collectibles, enemies, scenery like trees or rocks and more.
Lesson 7
For the starter task we looked at a unity project that has 11 problems and tried to identify as many as we could in the game itself and any scripts used. These are the problems and the ones I fixed.
- There are pickups in the scene but they don’t have a sprite attached to them.

- In the Pickup script the value variable is declared as a float when it should be an int.
- Destroy(this.gameObject) isn’t in the OnTriggerEnter2D void.
- The value in the awake void is set to 0 when it should be 10.
- The value is – the GameManager.Score when it should be +.
- The tag in the CompareTag is “player” when it should be “Player”.
- No trigger on the pickups.
- No Projectile.
- Axe doesn’t destroy when thrown.
- Axe throw force is 0.
Next we researched properties and coroutines:
Properties
What they are – a flexible tool to read and write the value of a variable.
How they are used – they are used in player xp/health to make sure the max and minimum value is always the same.
Coroutines
What they are – pauses the code and returns it to unity.
How they are used – you can call a coroutine to freeze the code and execute something and then go back to normal.
Next we went onto unity and added a death animation to the player and added an enemy. Then we went onto making the code for the damage and health systems in the playerMovement script and the enemy script. First we did the health for the player:
Then the damage for the enemy:
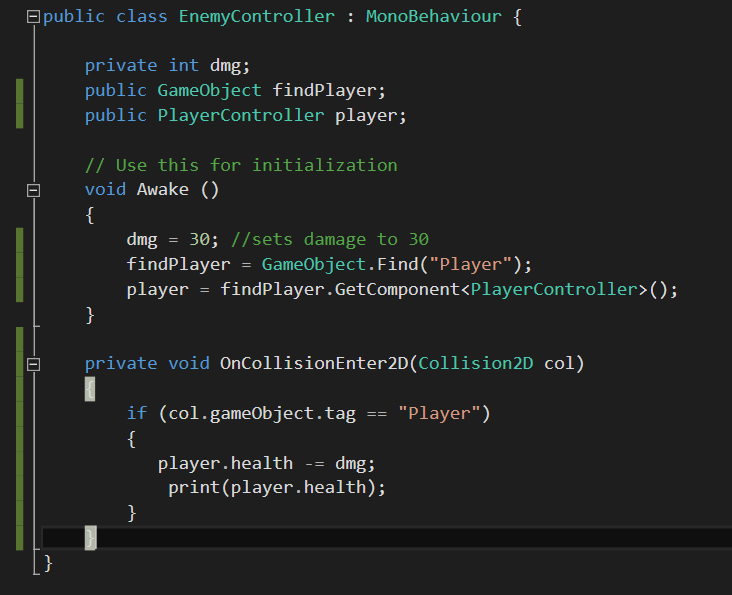
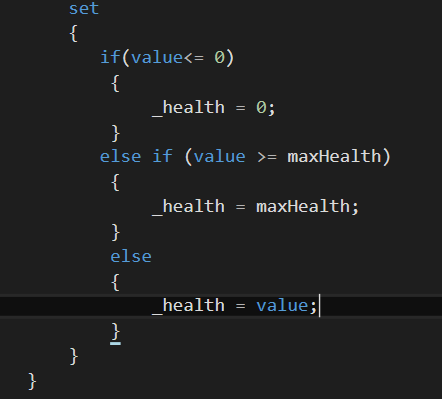
Then we made some changes to the health:

Lesson 8
To start with, we looked at angry birds and its mechanics to prepare for creating an angry birds style game.
Mechanics:
- Drag and aim mechanic
- Obstacle Physics
- Bird Physics
- Destructable Terrain
- Types of birds/abilities
- Explosive
- Damage
- Projectiles
Assets:
- Birds
- Platforms/blocks
- Pigs
- Ground
- Enemies
- Background
- Buildings
Player Interaction:
- Click and drag (one click)
- Touch screen/ mouse controls
Next we researched UML.
What is it – they are flow chart, class diagrams, and activity diagrams. These charts consist of boxes that contain structures of code. There are a lot more but we most likely wont use them in this course.
How do we use it – We use it to visualize code and how a computer works.
How is it beneficial to programming – It is a fast way to create prototypes for large pieces of code and it can improve workflow when script writing.
Examples of UML diagrams:
Class Diagram:
First I found a good example of a class diagram:

This is a good example of a class diagram for a monopoly game that you play against an AI player.
UML Flow Chart:
Then I found a good example of a flow chart:

This is a good example of how a flow chart works. This is a flow chart of making a cup of tea.
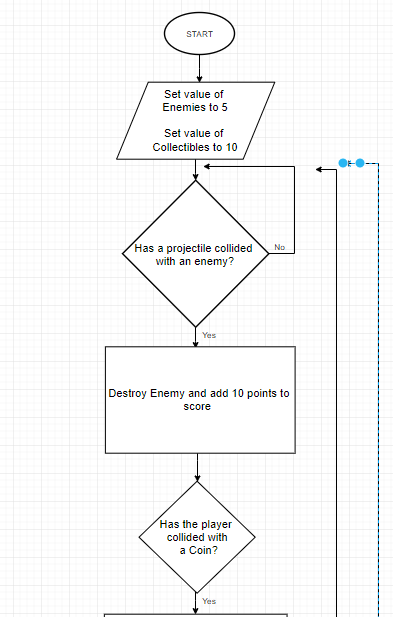
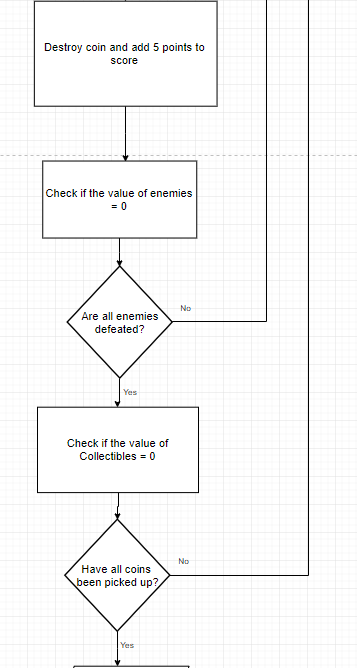
I used these examples to create some of my own UML diagrams. Starting with a flow chart. I created one for a win condition for a game where the player has to defeat all enemies and collect all coins in order to win.

Lesson 9
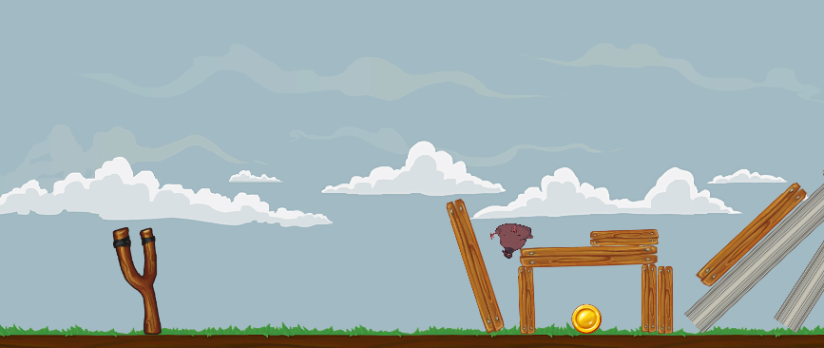
In this lesson we will be creating obstacles and enemies for our angry birds style game. We started by making some prefabs and creating a level and testing it:

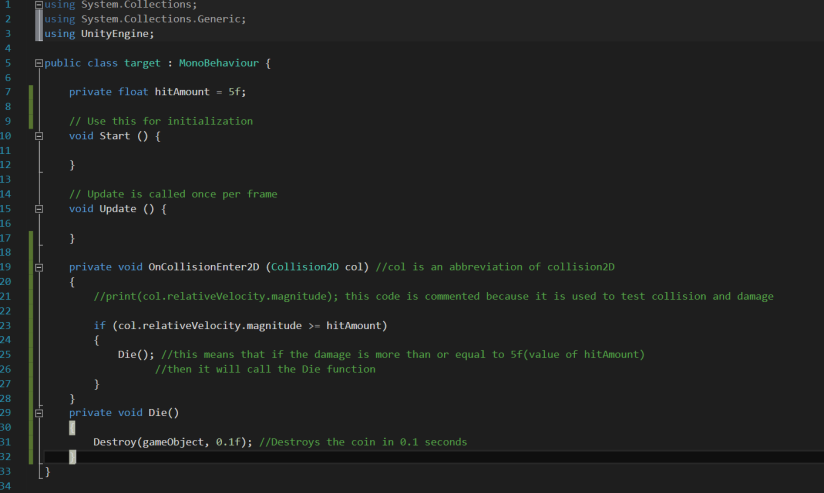
We then went onto writing the script for the targets damage:
Then we edited the projectile script to limit the amount the slingshot can be pulled back.
