
Week Number & Date: Week 4 – 18/03/2019
List of Tasks planned for this week:
These will be listed in priority order
- Create photo bashes for the male character and silhouette over them.
- Create designs from silhouettes.
- Create colour ideas from the designs.
- Produce development log showing screenshots of all ideas generation with annotations.
Current Position –
Male Soldier Test Piece 1
In this section I will show the development process of a male roman soldier character test piece.
For this test piece I will do 2 photo bashes from a selection of pictures and pick one that I like and silhouette over it, I will then use the silhouette to create a brief character concept. I will only colour it with solid colours because once I have done a variety of test pieces I will pick my favourite one and cel shade it.
Character Photobash 1
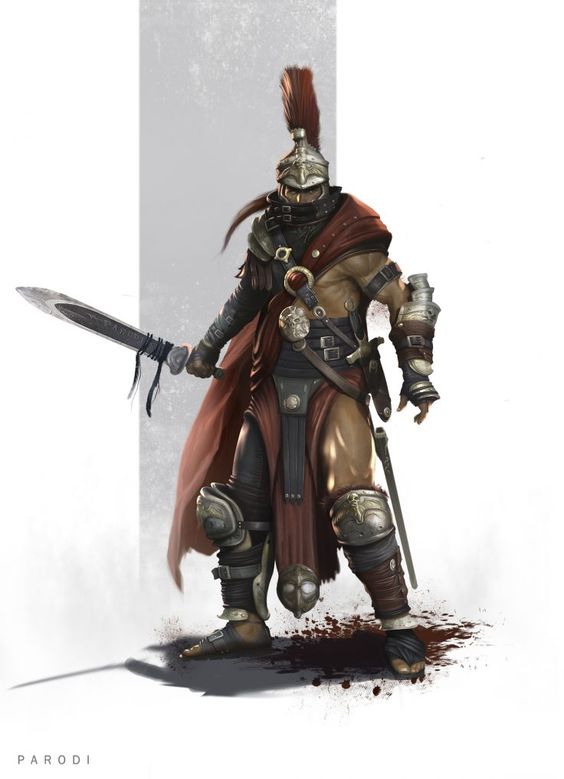
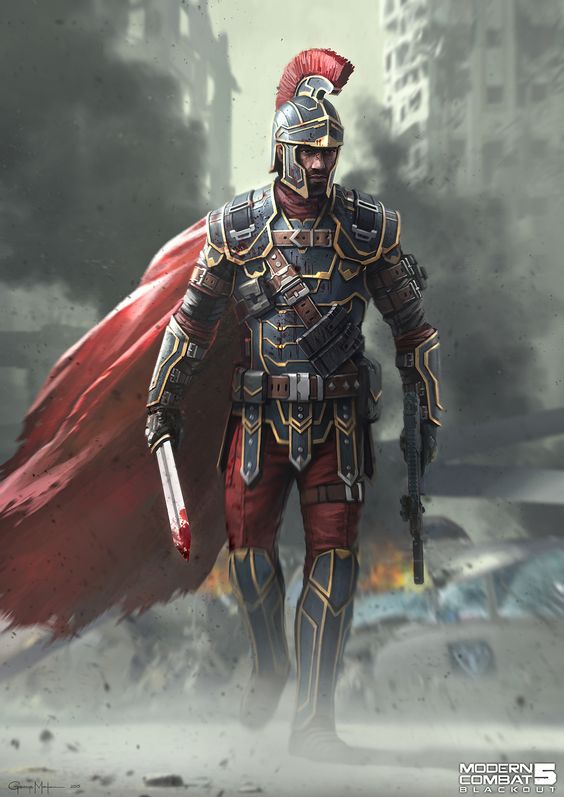

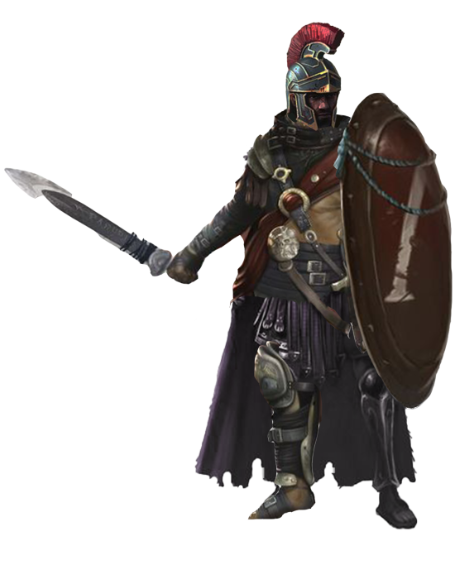
These are the three reference pictures that I have chosen to photobash together.
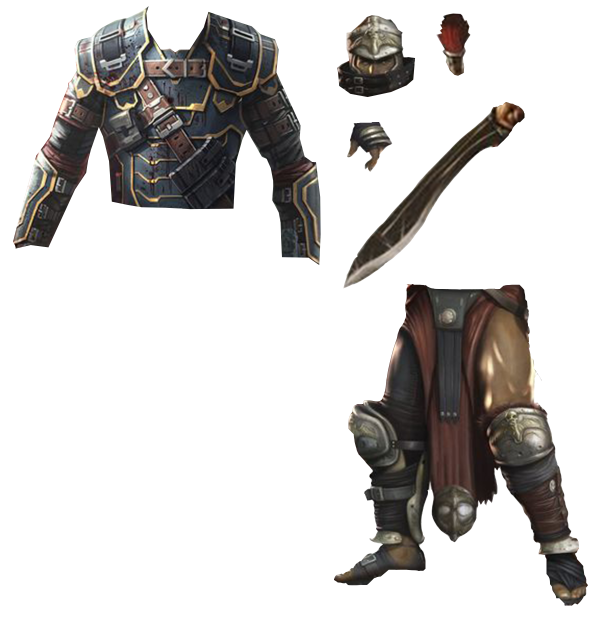
These are the cutouts that I will use to create my photobash.

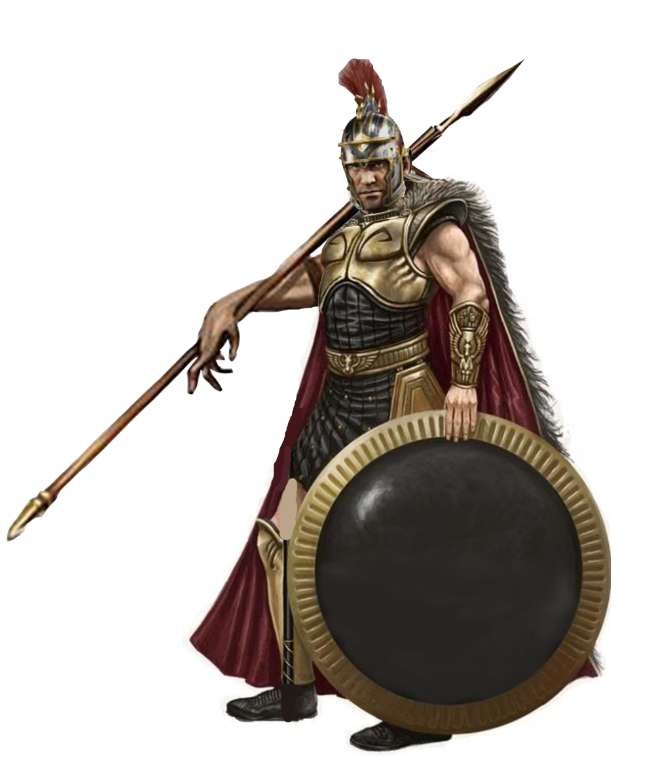
This is my finished photobash for this test piece. I tried to blend it together and I am happy with how it looks. I think that it will make a good initial idea to develop from. I created this because I needed some more ideas to start with sketches. I will now use this photobash to create an initial sketch and develop it on paper. Once I have come to a final design, I will transfer it into Photoshop and digitally draw it. First I used this photobash to create an initial sketch so that I could use it to create some more ideas for parts of the character:

These are some ideas that I got from the initial sketch. I tried to develop different helmets, swords, and boot ideas. I will use these ideas to create a few more designs to come to a final look.
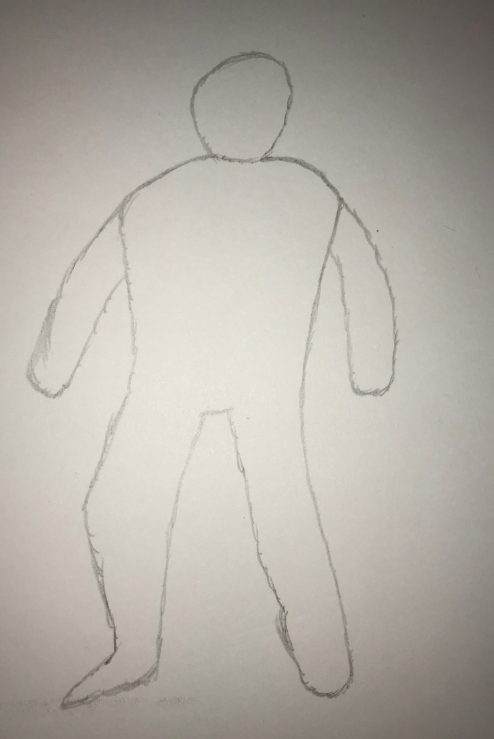
This is the base stance and shape that I want for my character and I will use it when creating my designs to keep them the right size.

These are two more designs that I made from my helmet, sword and boot ideas. Design 1 has helmet idea 1, sword idea 1 and boot idea 1. I like this one because I removed some detail from the chest armour so that it would free up more space for cel shading. Design 2 has helmet idea 2, sword idea 2, and boot idea 2. I like the sword on this one as it looks the most sharp and traditional out of all my designs. I think that design 1 would look better with my initial sketch helmet and no knee pads.
I will now take the aspects that I like the most from all of my designs and combine them to create a final look.
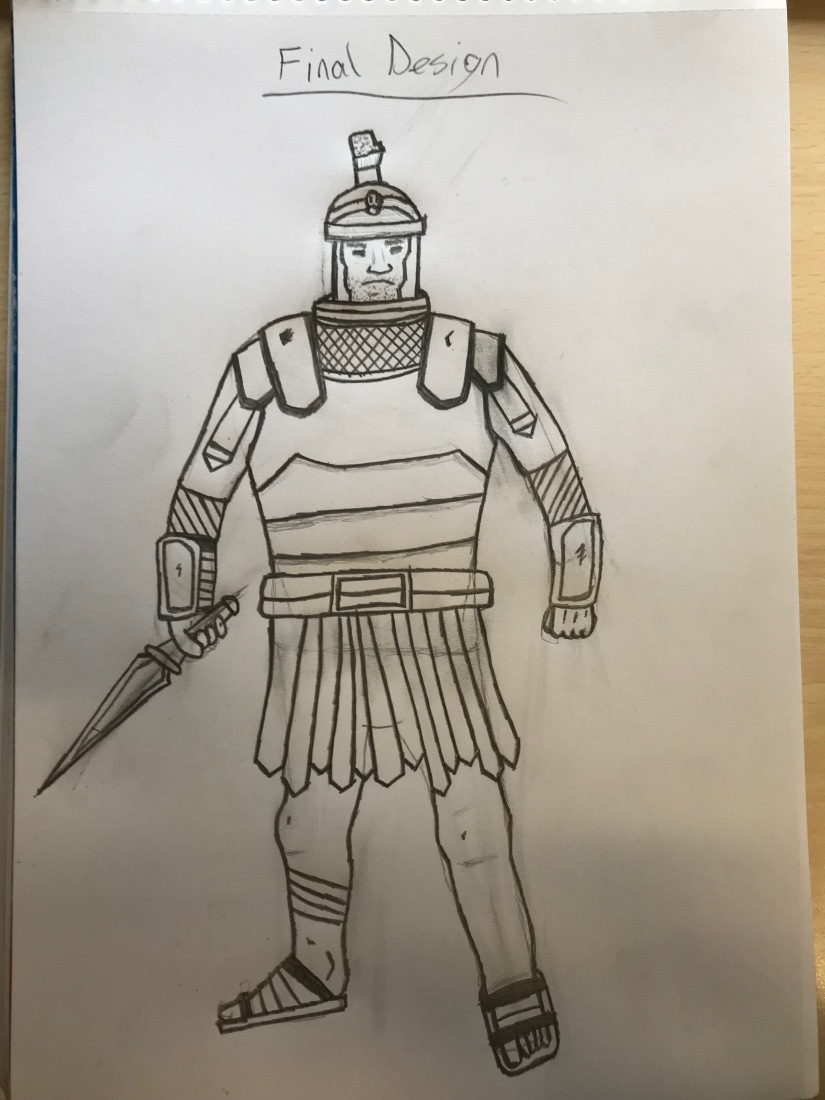
This is my final design for this test piece. I really like how this looks, I have tried to make it look like a cartoon with the dark outline and really like how it looks. I like how the collar around the helmet doesn’t look out of place with the chain-mail chest armour. I will use this design to transfer it into Photoshop to colour and shade.
I will now transfer this final design into Photoshop to digitize it and colour it.
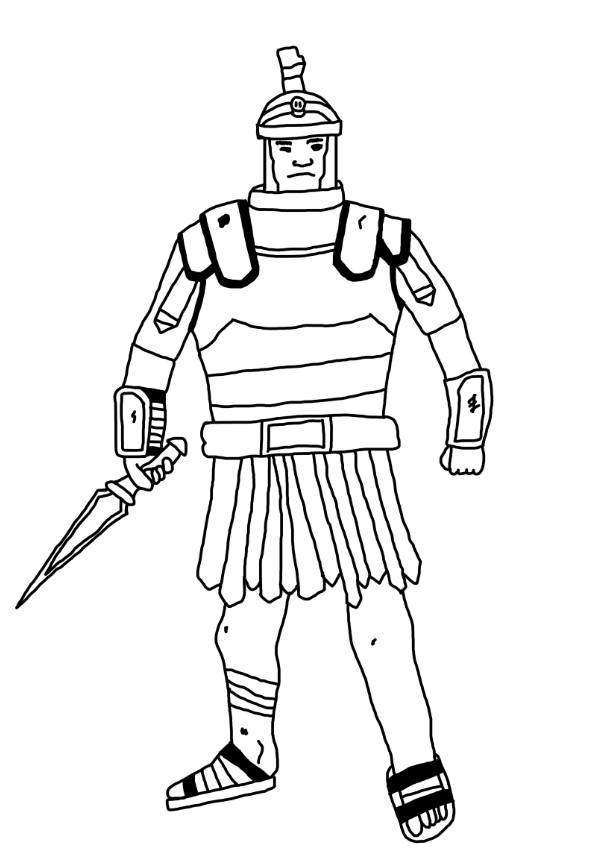
This is the outline of this character concept. I like this as it is the kind of dark outline that I want for my characters. I also added some markings to the armour for a little more detail. I will now colour it with some solid colours and create some side-by-side colour ideas:
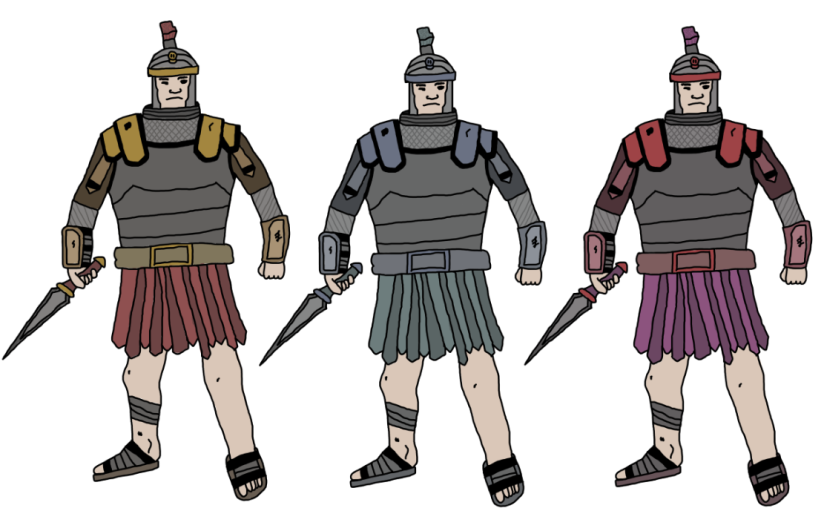
These are some colour ideas that I made for this character. I like ideas 1 and 2 because they are more of a traditional colour scheme for roman soldiers. I don’t really like idea 3 as much because I think it doesn’t look realistic with the amount of bright colours because roman armour would only have grey and bronze because it was made of steel and brass. Of all of these colour ideas I have chosen idea 1, I have chosen this one because it suits the armour the most and it looks like traditional roman armour.

This is my first test piece completed. I like how this turned out. Specifically the belt as it looks like traditional roman armour. If I chose this as my final concept I would also make a side and/or back view of it so that I would have something more to work on in the time we have to create our final pieces.
Male Soldier Test Piece 2
Character Photobash 2


These are the pictures that I will be using to create my photo bashes. I chose these pictures because I think that they will go together well and would create some cool silhouettes. This is how the photo bash turned out:
I decided to use one of the legs from reference 3 because I wanted a bit of variation. I also took a part out of the blade of the sword to make it look like a hooked blade. I like how this turned out as everything mostly blends together quite well and I think that once I silhouette it, it will create quite a good design. Now I will silhouette this and add things to it:

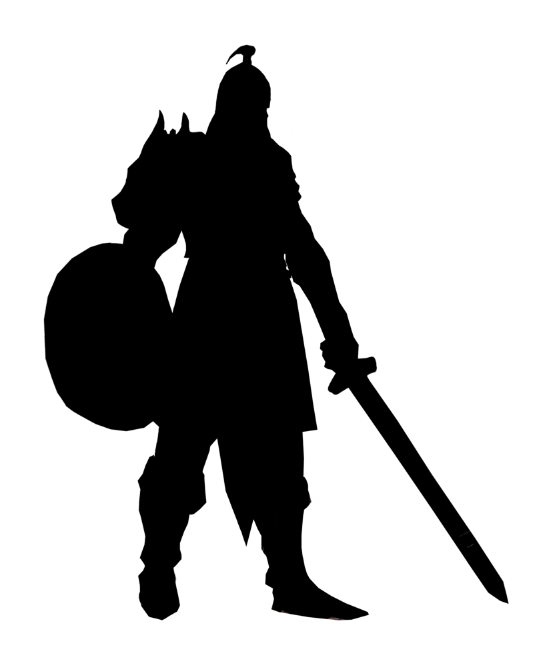
This is the original silhouette of my photo bash. I will add some more details to it and harden the edges. I like how this silhouette looks because you can tell what it is and what weapons he is holding. I would like to add more decoration to the shield and arms.
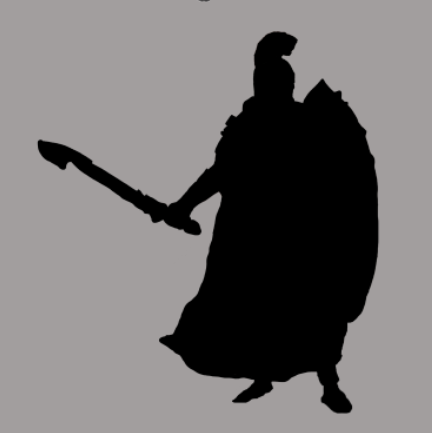
I have hardened the edges of the shield and arms and like how everything stands out a bit more now. I will now add some more details to come to a finished silhouette.

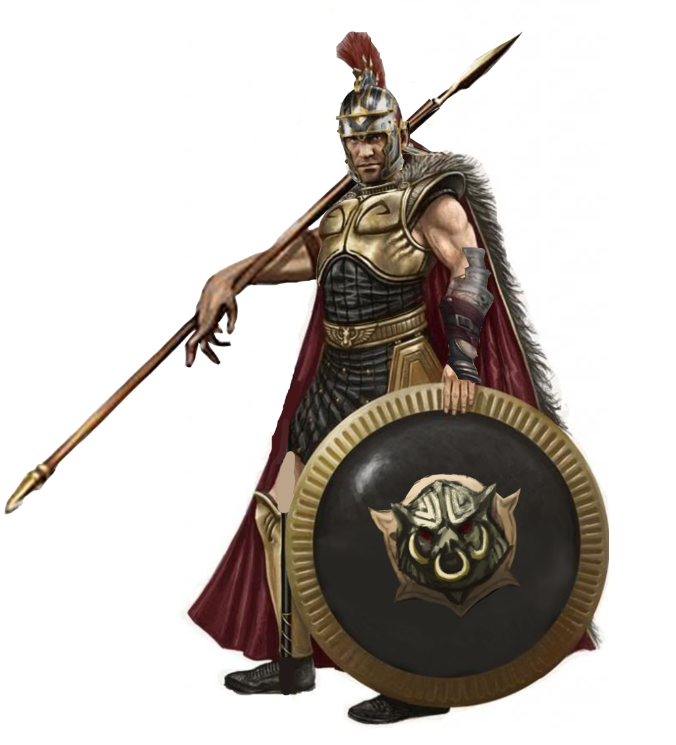
This is my finished silhouette for this test piece. I like how the shield looks in this silhouette. I tried to make it look like there is a lions face sculpted into the shield with spikes on the top and bottom. One thing that I think could look better is the sword as it doesn’t look very sharp. I will now use this silhouette to create an outline for this test piece then I will colour it.
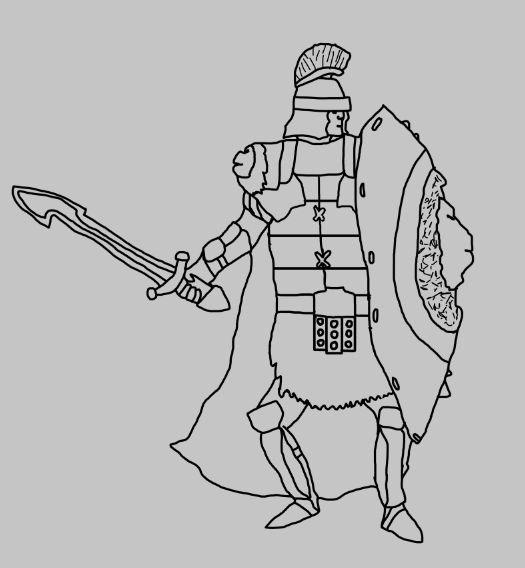
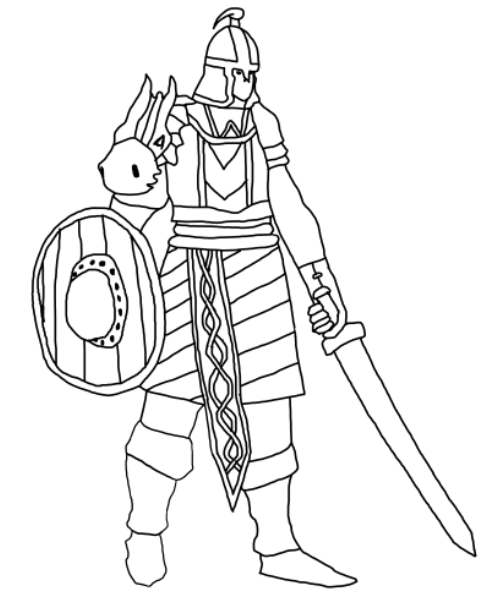
This is the outline that I created from my silhouette. I like how this looks and I am happy with how the shield turned out with the lions face.
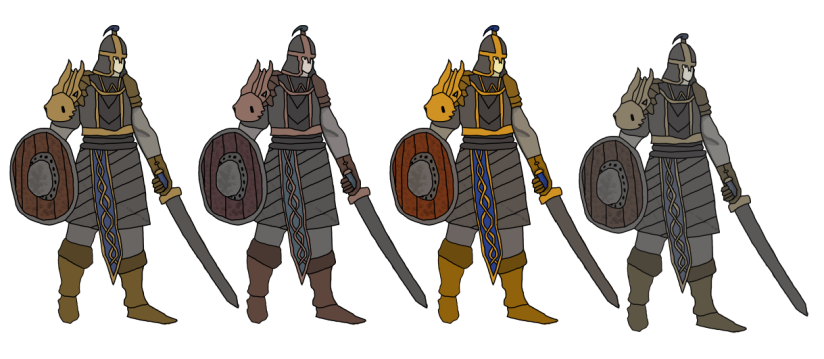
These are the different colour ideas that I came up with, I started with some dark colours for the first two, and then I went with more saturation for the the third one. I like the third one as I think that it suits the cel-shaded style the most out of all of them.
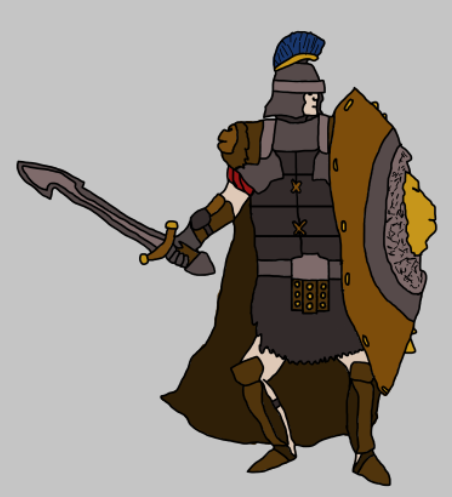
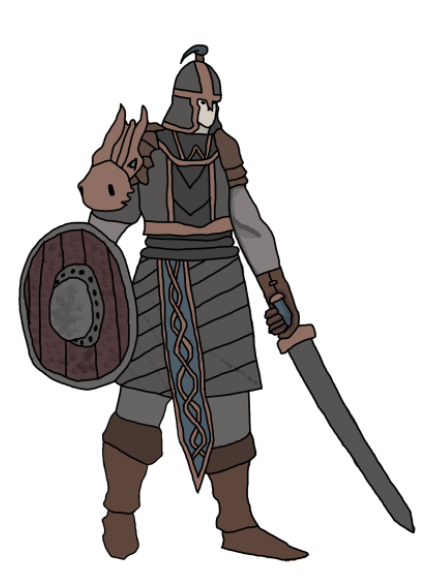
This is the finished piece for this test piece. I like this one because of the shield, I think that this would look really good once it is cel shaded.
Male Roman Soldier Test Piece 3
Character Photobash 3
In this section I will show the development process of a male roman soldier character test piece.

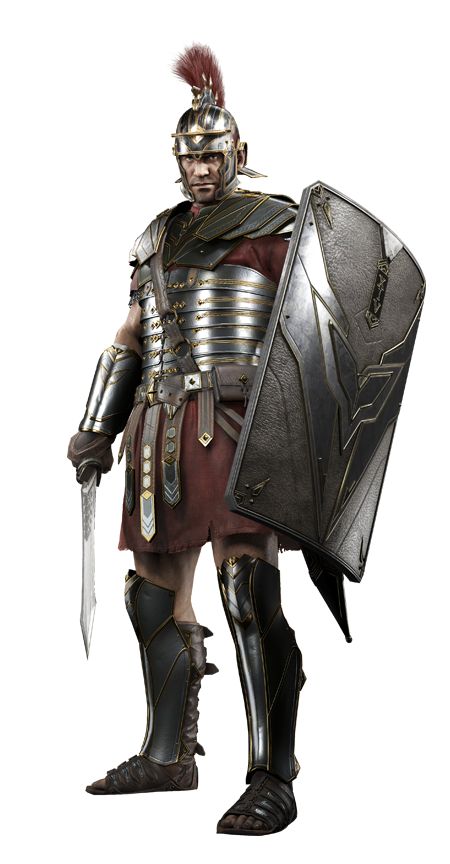


These are the images that I will be using for the photo bashes for this test piece. I like these images as they look like they would fit together well in a photo bash. I chose the shield image because I would like to add parts of it to one of my photo bashes and it is the kind of style that I want to create.
I’m happy with how this turned out. I think that it will make an interesting silhouette to work with.
I added one more thing to this photobash as I thought that the shield needed more detail. I will now go onto silhouetting the photobash and adding some details.

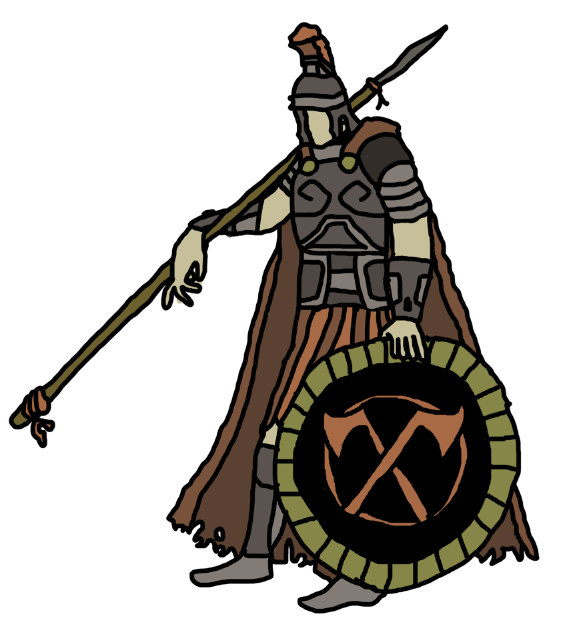
This is the original silhouette. I like this as you can tell what the character is from distinctive features like the helmet and weapon. But I do think that it needs a bit more detail.

This is the edited silhouette. I added some more details to the weapon. I also added a gauntlet to the arm holding the weapon and added some tears to the bottom of the cape to make the silhouette more recognisable. One thing I found difficult this week was thinking of the different combinations of pictures that I could use to make photo bashes. I also found it hard to keep up with my annotations so I will make sure to keep on top of that next week. I completed all tasks that I set for myself this week.
Planning for next week –
Next week I need to finish off my character test pieces and start creation on some female test pieces. I will get some peer feedback to help me improve on my work. So far I have managed to keep up with my plans for the week. I will use my peer feedback to improve some things about my work.
Week Number & Date: Week 5 – 25/03/2019
List of Tasks planned for this week:
These will be listed in priority order
- Finish off male character test pieces.
- Produce female character test pieces.
- Produce colour ideas for characters.
- Look at different character stances.
- Start sketching ideas for monolith shapes and shrines.
- Produce development log with screenshots and annotate.
Current Position –
Now I will use the silhouette to create an outline for this test piece.

This is the outline that I created using the silhouette that I created from my photo bash. Now i will make some colour ideas to come to a final piece.

These are some colour ideas that I created. I like the first one as it, is simple and like traditional roman armour. The second one is more saturated with brighter colours. I like the third one as I think that this colour style suits the character. The third one is the one that I have chosen to use as my final piece for this test piece.
This is the finished test piece. I like the weapon for this one as it is unique compared to the other ones. I like how this turned out and think that it would look good if I choose to cel-shade this one. Out of all of my male character concepts, I like this one the most and will develop this one further when I come to creating my final concepts.
Female Character Ideas Generation
Female Character Photobash
To start my ideas generation for female characters I used some of the pictures from my female character photobash reference mood board to photobash an idea.
These are the pictures that I used.
I think that these will fit together nicely. I particularly like the gold chest armour as it looks cel shaded, so I can use this when creating a design to help with shading.
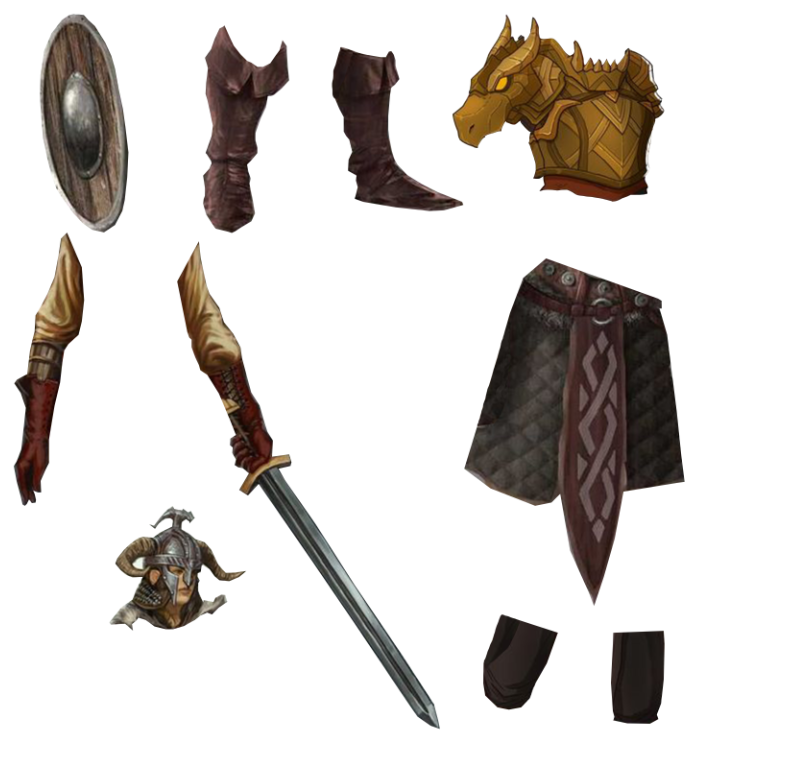
These are all of the parts that I have cut out of the reference pictures to put together.

This is the finished photobash. I think I should make a couple of silhouettes from this as I think that the helmet looks a lot like a vikings helmet so I will change that.
Character Silhouette

This is my initial silhouette that I created from my photobash. I will use this to adapt my design by adding to it. I will create 3 different silhouettes and pick my favorite one.

These are the silhouettes that I created. I like the third one as I added a cape to the back. I do like the fourth one. Which is the same as the first one with a different helmet. I will use this one to create a outline.
This is the outline for this test piece. I like how this looks. particularly the shield, which looks like a traditional roman shield. I will now create some colour ideas to come to a final look for this test piece.
I didn’t find anything that difficult this week as it was all ideas generation. I didn’t get around to creating some shape ideas for the monolith and shrine objects. I will do some of this over the weekend.
Plans for weekend –
Next week I will Sketch different shape ideas for monolith objects using research for help and pick a few that I like the most and create some detailed sketches.
Planning for next week –
Over the weekend and next week I plan to finish my female character test pieces and do some sketches to come to final ideas for my monolith and shrine objects. In future, I should organize what I am going to do at the start of each lesson by using a checklist.
Week Number & Date: Week 6 – 01/04/2019
List of Tasks planned for this week:
These will be listed in priority order
- Finish Monolith detailed sketches – pick favorite to use for final piece.
- Create Shrine ideas/detailed sketches – pick favorite to use for final piece.
- Create 2 more female character test pieces with different colour ideas and stances.
- Produce development log with screenshots and annotate.
- Complete task 2.2 ready for the deadline and annotate.
INTERIM DEADLINE 2 – PROBLEM SOLVING – Task 2.2– 05/04/19 – Due at 10am
Current Position –
Female Character Photobash
These are the pictures that I used for this photobash:
For this photobash I tried to use all of my reference pictures . These are what I used from each picture.

These are all of the parts that I cut out of the pictures to create the photo bash.
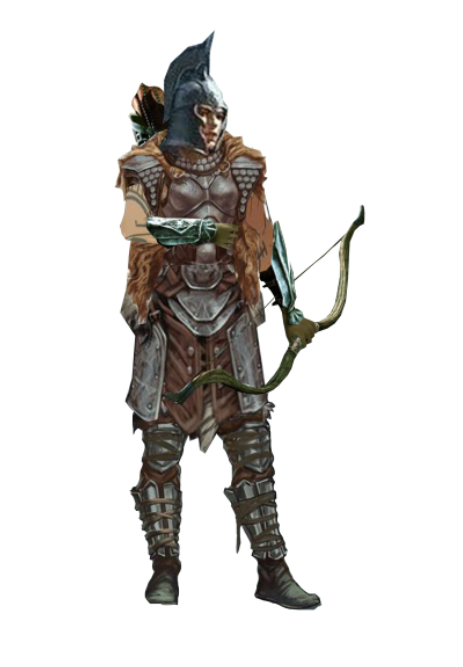
This is the finished photo bash for this test piece. I like this one as they are holding a bow and I haven’t done an archer character yet. I like the fur cape as that is something that I haven’t tried on any of my test pieces yet..
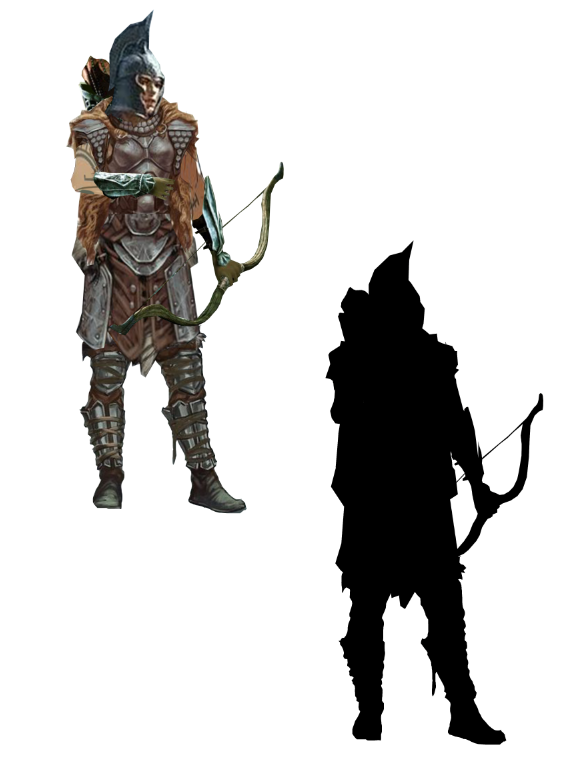
Next I made a silhouette from the photobash so that I could use it to create an outline for the character.

This is the outline that I created from the silhouette. I tried to make it look like a cartoon so that it would suit the cel shaded art style. I removed some of the detail so that I would have more space to shade it if I were to pick this one as my final idea.

Here are a few colour ideas that I did for this character. I like the left one as it has the more traditional brown and gold colours. I like the right one as I tried to go for an elven kind of colour scheme as the character is an archer. I like the middle one the most because because I just think that it suits the character the most.

This is the finished idea for this test piece. I really like this one as it has some nice colours and I like that they are holding a bow rather than a sword. This is the idea that I will develop into one of my final concepts.
Monolith Object Concept Ideas Generation

To start my ideas generation for my monolith object concept. I sketched a number of different shapes and sizes of monoliths and chose the ones that I liked the most. The ideas I have picked are idea 2, idea 6, idea 8, and idea 10.
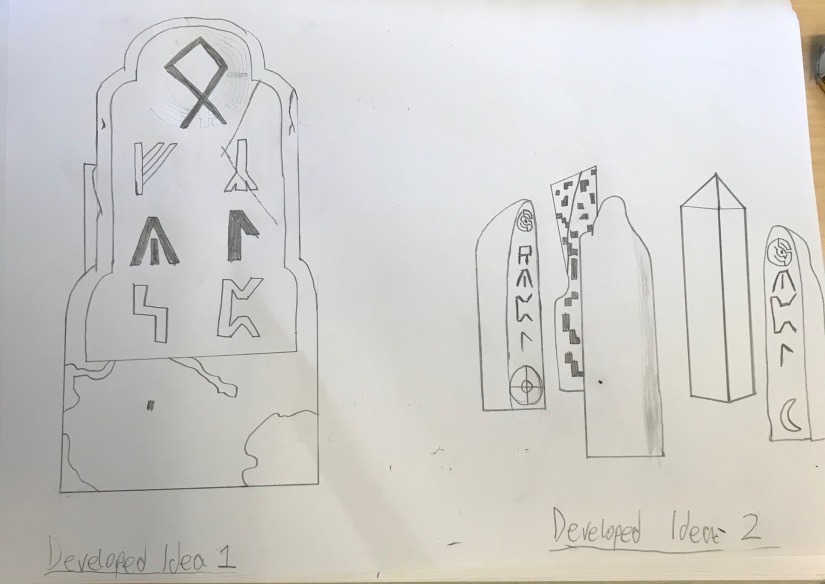
These are developed designs of the 4 favourite ideas from my initial ideas. I like idea 1 because of the moss and the cracks on it, making it look old. I like idea 2 because there are multiple monoliths, I could put an environment around it like a river. I like idea 3 because it looks like an ancient tablet with a script. I like idea 4 because of its unique shape. I will now develop these into brief test pieces to get a better idea of what they would look like as final pieces. Starting with developed idea 3.
Monolith Test Piece 1
I started this test piece by going over my 3rd developed idea in Photoshop to create the outline.
I then took this outline to create some different colour ideas:

I like the left idea as it looks like it is made from concrete which is the material mainly used in roman architecture. I like the middle idea because it looks like painted stone which I think looks cool. The colours go together well with the pattern and style of the concept. Same with the right idea, I think that the colours go well together and suit the style of the concept. Out of all of them I like the middle idea the most and will take that one as the final look for this test piece.
I decided to go with the blue stone colour idea as the final look for this test piece because I think that it suits the style the most out of all my colour ideas..
Monolith Test Piece 2
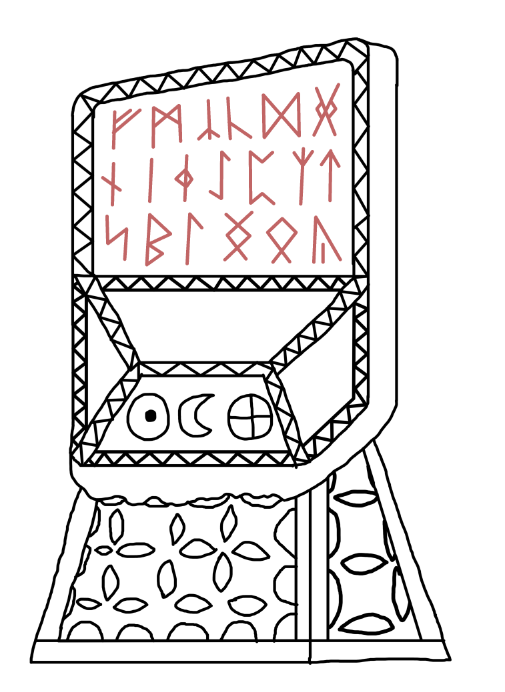
I started this test piece by going over my 4th developed idea in photoshop to create an outline for the test piece.
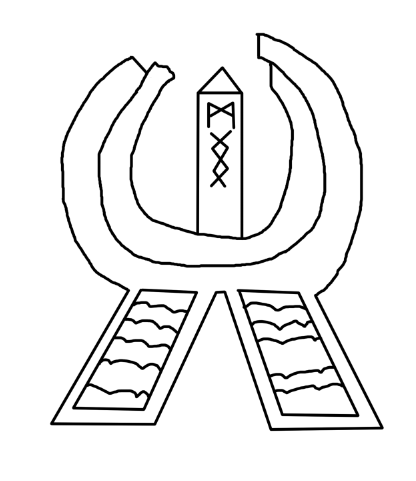
I then took this outline and used it to create a couple of colour ideas to come to a final look for the test piece.
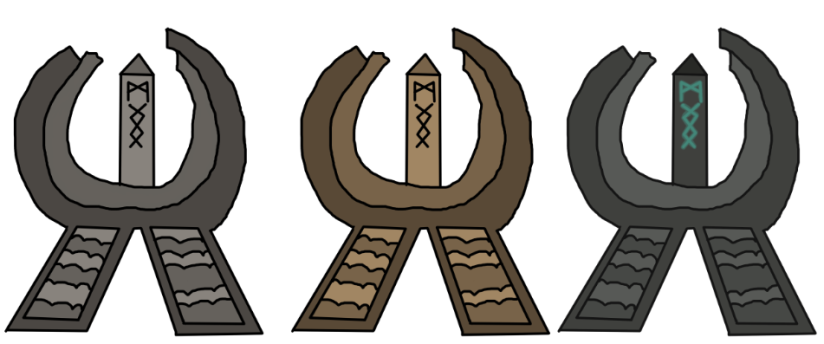
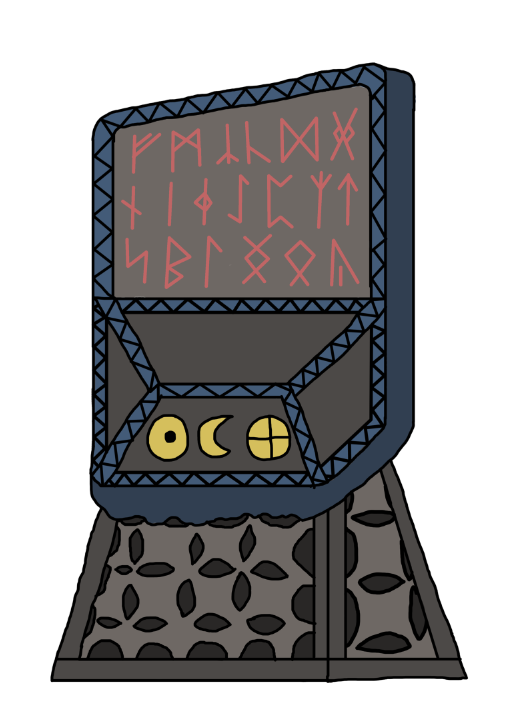
I like the left idea as it looks like it is made from stone. I like the middle idea because it looks like it is made from concrete which is the main material that is used in roman architecture. I really like the right idea because the runes on the pillar in the middle look like they are glowing and I made the stone a bit darker to make them stand out more.

I decided to go with the right colour idea as it stood out more than the others and I think that it would suit the cel shaded look if I decide to go with this one for my final idea.
Out of all of my test pieces for the monolith, I have chosen to take test piece 1 forward to develop further for the final piece.
Shrine Object Concept Ideas Generation

To start my ideas generation for my shrine object concept. I sketched a number of different shapes and sizes of monoliths and chose the ones that I liked the most. The ideas I have picked are idea 1, idea 4, idea 3, and idea 2.

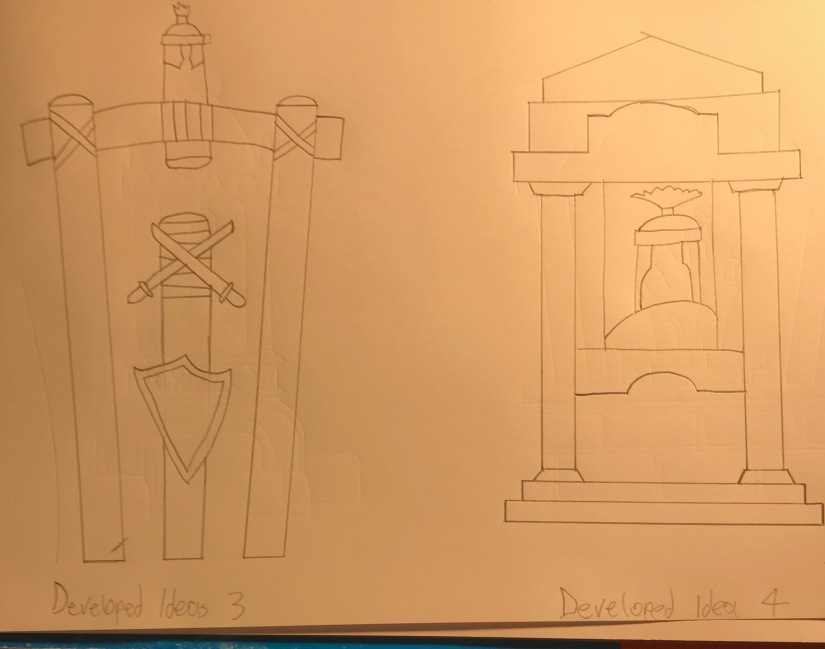
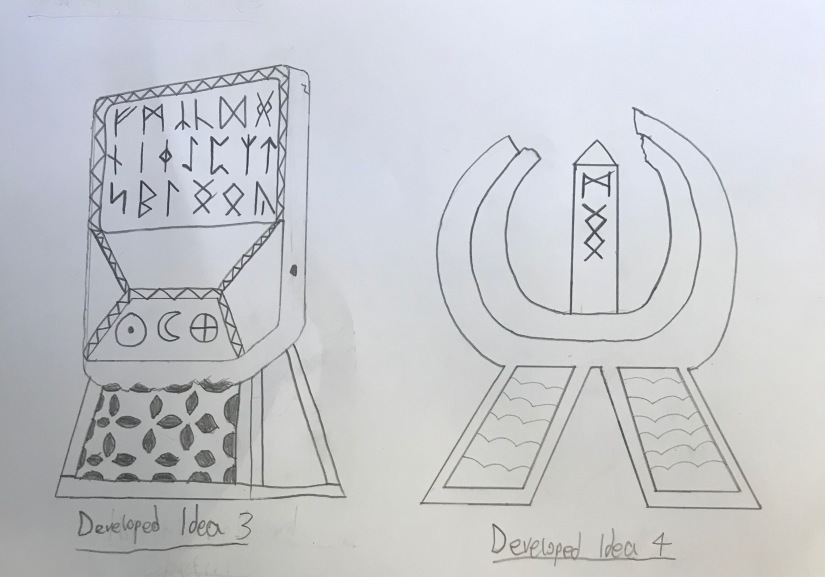
These are developed designs of the 4 favourite ideas from my initial ideas. I like idea 1 because of the detail on it like the patterns. I like idea 2 because the chest armour and helmet is displayed. I like idea 3 because it looks more man made, with the tied wooden poles. I like idea 4 because it looks like it can be part of a building like an outcrop from a wall. I will now develop these into brief test pieces to get a better idea of what they would look like as final pieces. Starting with developed idea 4.
Shrine Test Piece 1
I started the test piece by digitizing the developed idea and adding a few more details like the helmet. I coloured it with a series of greys to begin with as I wanted it to look like it is made of stone.
I like how this looks but I will create a few more colour ideas for this.
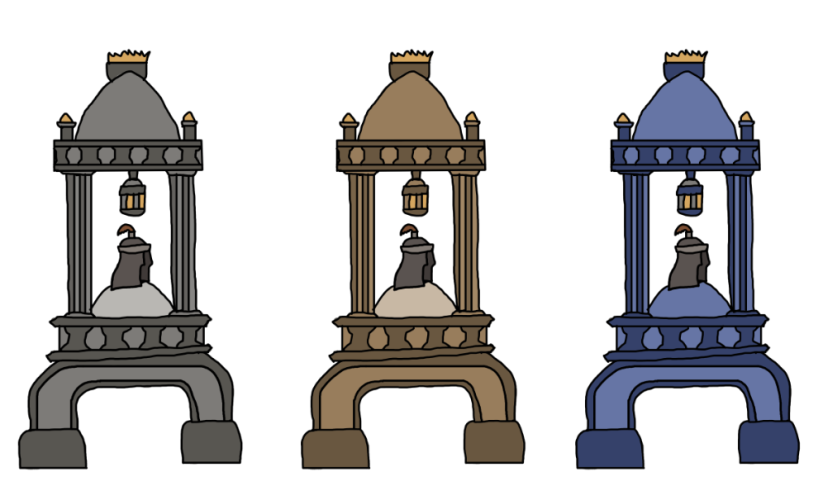
Next I made 2 more colour ideas and put all of my ideas side by side so I can pick out my favourite.

For the middle idea I tried to make it look like it is made out of wood. I like how this one looks but it is a bit unrealistic have wooden pillars in roman architecture. For the right idea I tried to make it look like it was made from concrete as that is the main building material used in roman architecture.

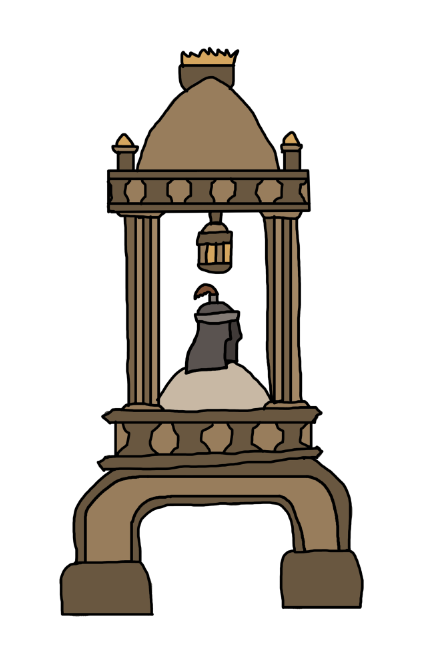
I decided to go with the concrete colour idea as the final look for this test piece because I want my project to link with ancient rome so I went with the roman architecture look.
Shrine Test Piece 2
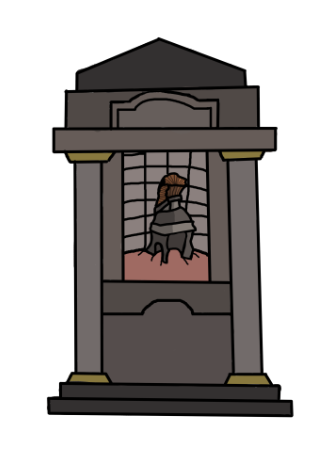
I started this test piece by digitizing the developed idea in Photoshop. This is how it turned out.

I created this by going over my developed idea with the paintbrush. I will now create some colour ideas for this idea.
Like my first shrine test piece, I had a look at stone colours and concrete colours for this shrine. I like the left idea as it looks like it is made out of stone. I like the middle idea because it looks like it is made out of concrete which is the main material that is used in roman architecture. Which is what I want my concepts to look like. I like the right idea because it looks like it is made from painted metal, which I think looks more traditional for a shrine. But out of all of them I am going with the middle one as it looks like concrete.
I decided to go with the concrete colour idea as the final look for this test piece because I want my project to link with ancient rome so I went with the roman architecture look.
From my 2 shrine test pieces, I have chosen test piece 1 to develop further when I come to doing my project.
This week I found it quite difficult to think of ideas for my shrine object, Everything else I found easy as I already had an idea of the kind of ideas I could create. I completed all tasks for this week.
Planning for next week –
Next week I will need to start on my final pieces and work on any referrals that I may get in my deadline work. So far I don’t think that I need to change anything in my planning as I have gotten everything that I wanted to do done in the past few weeks with little problems.
