
2D Art
Fantasy Character Design 1 Ideas Generation
This section will contain my development process for my first 2D fantasy character, which will be a monster.
Photo-bashing
To start of my design I will do a character photo-bash that I will later improve through silhouetting.
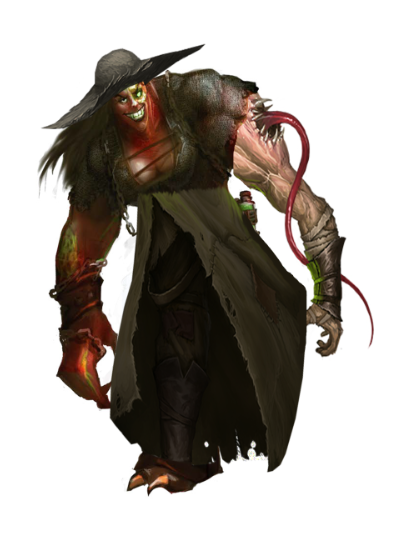
For this one I found 2 character concepts on google (reference links in bibliography) that I thought would go together well in terms of colour, art style and atmosphere. These are the references I liked:


I picked these as I like the body shape of the left character. I also like the dark colours, because it gives a feel that the character would likely be an enemy if it were to be put into a game, maybe even a boss. I also like the outfit of the right character, I think that the arm would suit the left character as it is mutated. Now I will transfer these characters to Photoshop to cut them out with the marquee tools.
I cut out the arm, the hat and the cloak thats around the characters legs from the right reference and used the left reference for the base build of the character. I like this build as it looks like a mutated creature that has amplified proportions. I removed the right arm and added the right reference’s arm and added the hat and cloak around its legs. This is what the finished character looked like:
I like this as its quite a good shape to do some silhouetting with, for example I could change up the outfit and the mutations of the character. The only thing I don’t like is the blending of the cloak around the legs to the body because due to the colours being so different I couldn’t do much to blend it. I changed the brightness and contrast and the hue and saturation.
Silhouetting
In this section I will be taking my character photo-bashes and turning them into silhouettes to improve them. This will be a good way for me to develop more ideas the final product.
For this one I got my photo-bashed character and added a color overlay to it to make a silhouette:

Once I did that I used the silhouette to decide on some extra features to add to the character. I also changed the background to white and the silhouette to black so I could see things clearer. This is what I added:
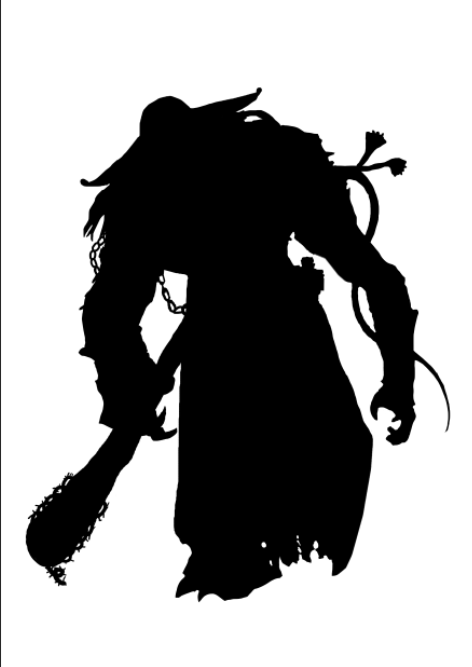
I added a weapon to his hand and some extra chains to his arm. I also added flowers to the tentacle on his left arm to make it look more like ivy, because I want this character to be a mutated zombie.
Finishing Character Design 1
Now I will begin to finish my first 2D character, first by making the outline using the silhouette that I made:
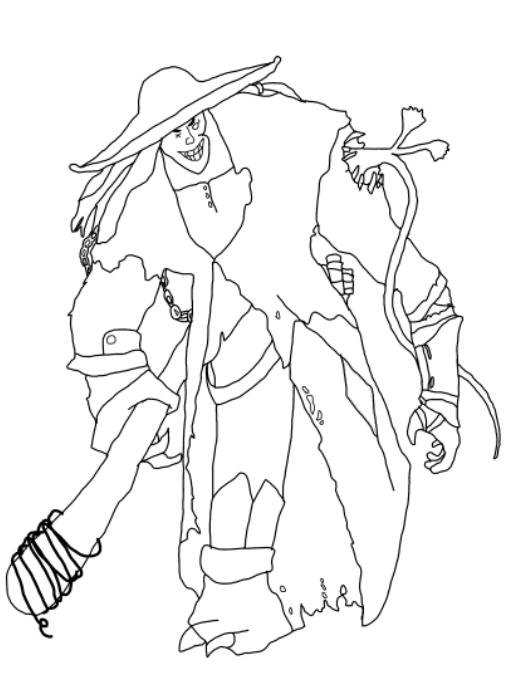
I like how this turned out although the lines could be a bit thicker so that they would be visible once I colour it. I made sure the character had some differences to the photobash so that it would be using my ideas. For example, rather than just copying the clothes off of the photo-bash I made some changes to make it my own. Next I coloured it:
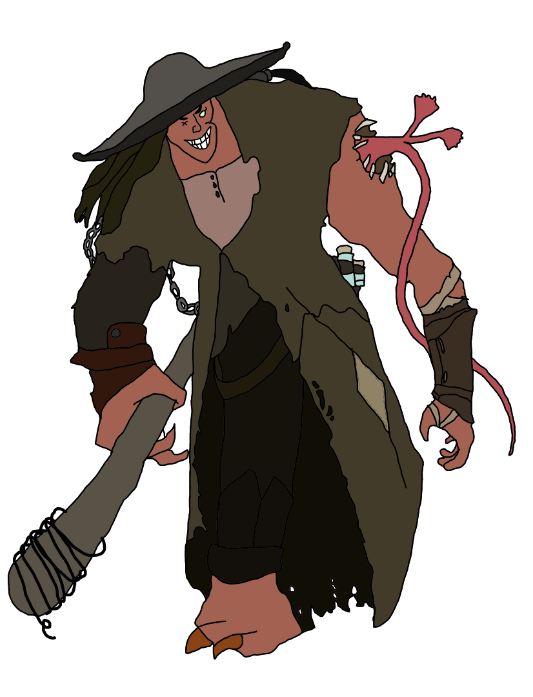
I used the same colours as the photo-bash for the character as they are supposed to look undead. I really like how this turned out and think that once I add some shading to it, it would turn out pretty well. This is the finished character:

I think this turned out quite well. I particularly like how the tentacle turned out
Fantasy Character Design 2 Ideas Generation
In this section I will be showing the development process of my second 2D fantasy dwarf mage.
Photo-bashing
First I got 2 reference pictures that I thought would fit together well. I made sure that the art style was similar on both pictures, these are the two that I found:

Using these characters as reference, I sketched so possible designs for my photo-bash:

I picked design three because it uses a good mixture of each character and it will be the most simple to make.
Next I cut out each character, I chose the one I wanted to use as the base layer to add things to. I chose the left character:

Next I cut out the hood from the right character and added it to the base character, I used the eyedropper and paint brush tool to change the colour of the hood and to replicate the shading in red so that it would blend well with the base layer:
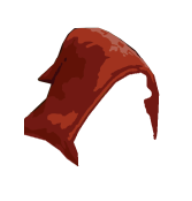
Next I used the eraser tool to rub out the hair that goes out from under the hood. then cut out the shotgun and the legs from the right character and added that. I erased any parts that didn’t line up including the entire staff and the base character’s legs. This is how the finished photo-bash turned out:
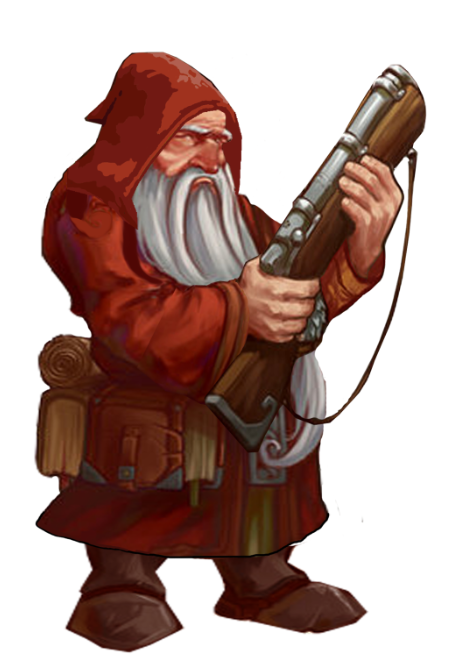
I think that this photo-bash turned out excellently. I really like how everything fits together perfectly and think that it will be a really good character to recreate into a piece of concept art. I will not use this photo-bash to do some silhouetting because I feel that there isn’t really any more I can add. I will use this character to create my concept art but will make changes so that I’m not completely copying my photo-bash.
Fantasy Character Design 3 Generation
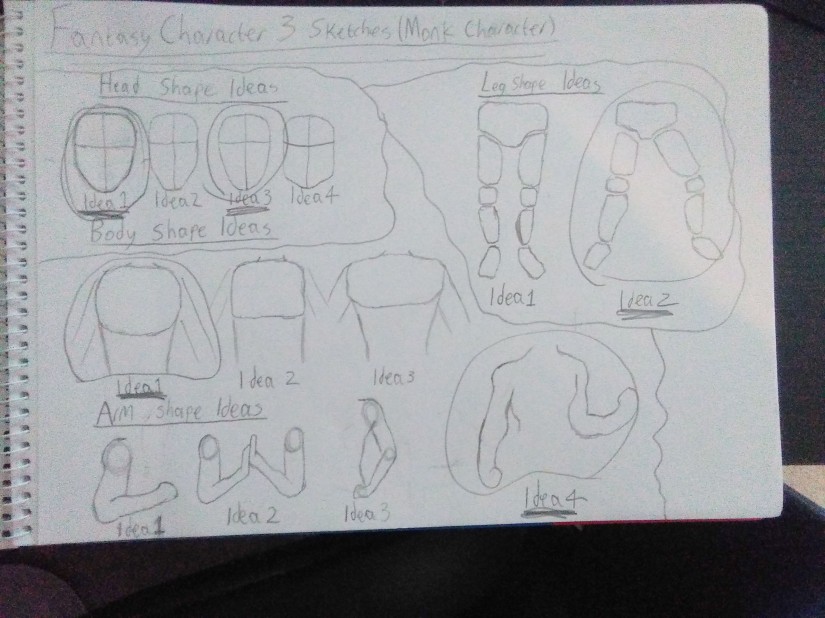
In this section I will show the design process for a fantasy monk character. I will show how I developed my sketches to come to my final idea.
Sketching
I started my design process by just sketching out some head, body, arms, and leg shapes. I chose the ones that I liked.
Digital Sketching
Once I did that I used the ideas I liked to create a design (design 1). I liked this but wanted to add more than just a simple shirt. So I made a second design and added another shirt on top and a gauntlet on one arm and a bandage wrap on the other. I also added a bag to his waist.
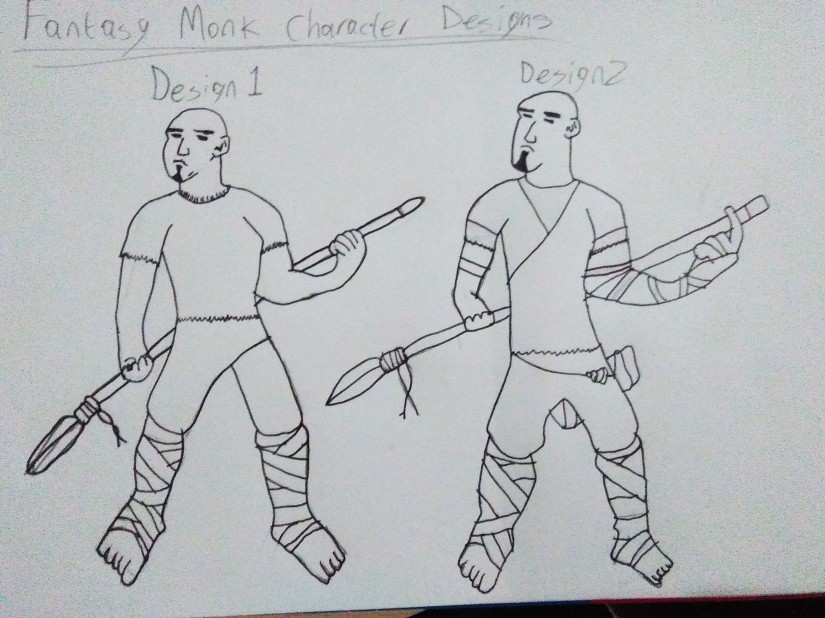
From these 2 designs I have chosen the second one to be my finished design.
Of all my designs I have chosen Fantasy Character Design 2 to be my final idea.
Fantasy Themed 3D Models
In this section I will show the design process of 2 Fantasy 3D models, including blockouts, unwraps and textures.
Explosive Barrel Model Development
Explosive Barrel Model Development
In this section I will document the development of a fantasy-themed explosive barrel model.
To get some ideas I found some reference images of some barrels to use when blocking out. These are the ones I will use:
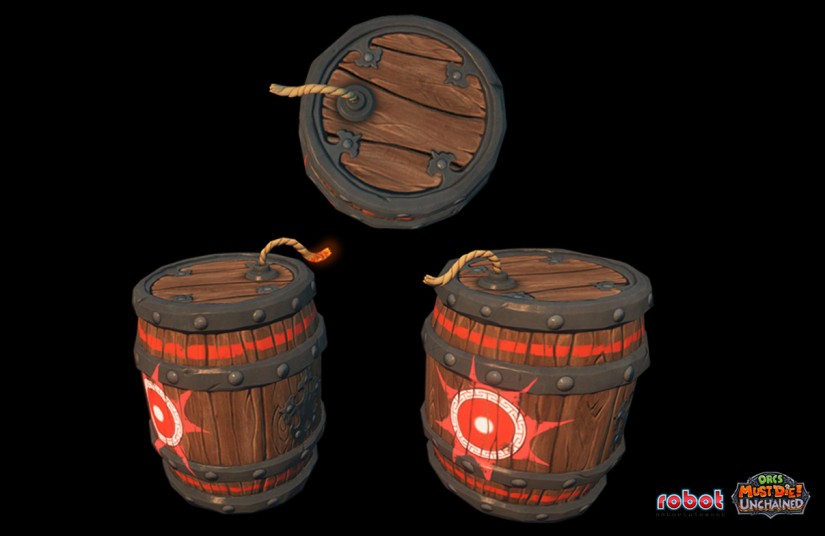
I picked this one because I liked the look of the fuse and will add that to my barrel because I plan to make it look stylized and think that it would suit the look.

I will use this image to model the main part of the barrel, because I like the look of the wood planks at the top and bottom.
I used the references to create a blockout for the barrel. I connected the edges to create the bands at the top and bottom and extruded them out. I also extruded inwards at the top to make a second circular edge then extruded upwards to create the stylized looking planks at the top and bottom. This is what it looked like:

I will add more detail to this barrel and unwrap it in the development log.
I then went to the top to create the fuse. This was fairly quick to do as all I needed to do was extrude in the middle and rotate as I extruded it higher. I then used bevel on any sharp edges to give it the smooth look. This is what it looked like:
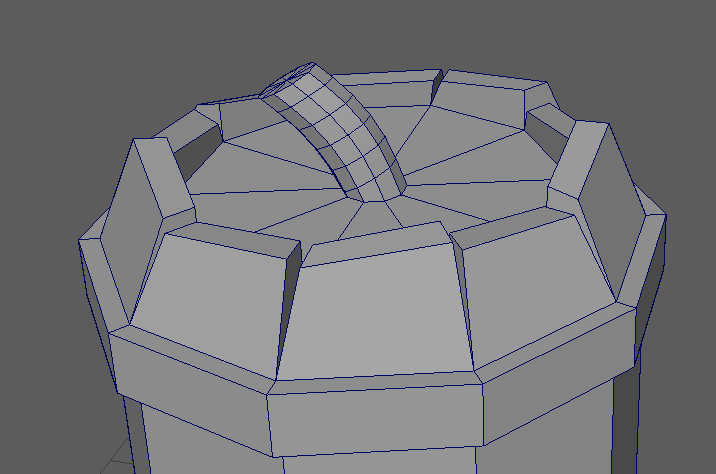
I then made another band in the middle and the selected all the middle faces and scaled them to give the barrel the curved shape. This is what the finished blockout looked like:

I really like how this turned out, I’m happy with how stylized it looks because that was what I was going for.
In this section I will document the development of a fantasy-themed explosive barrel model.
To get some ideas I found some reference images of some barrels to use when blocking out. These are the ones I will use:
I picked this one because I liked the look of the fuse and will add that to my barrel because I plan to make it look stylized and think that it would suit the look.
I will use this image to model the main part of the barrel, because I like the look of the wood planks at the top and bottom.
I used the references to create a blockout for the barrel. I connected the edges to create the bands at the top and bottom and extruded them out. I also extruded inwards at the top to make a second circular edge then extruded upwards to create the stylized looking planks at the top and bottom. This is what it looked like:
I will add more detail to this barrel and unwrap it in the development log.
I then went to the top to create the fuse. This was fairly quick to do as all I needed to do was extrude in the middle and rotate as I extruded it higher. I then used bevel on any sharp edges to give it the smooth look. This is what it looked like:
I then made another band in the middle and the selected all the middle faces and scaled them to give the barrel the curved shape. This is what the finished blockout looked like:
I really like how this turned out, I’m happy with how stylized it looks because that was what I was going for.
Treasure Chest Blockout
In this section I will show the blockout for my fantasy treasure chest model. First I found a reference images:
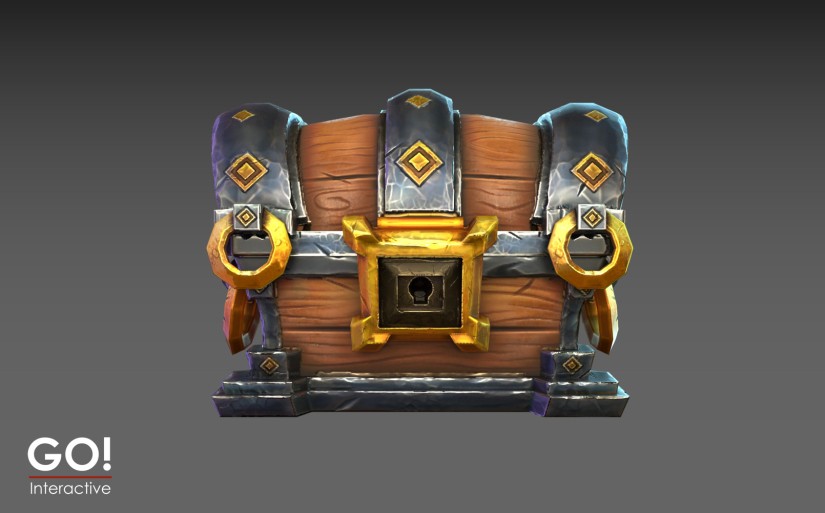
I used this image to create the basic shape of the chest and will add the hoops and the frame later:


Programming
In this section I will produce some coding prototypes for movement, collision, simple physics, instantiation, collectibles and using variables.
Pseudo code
Movement
Function playerMovement
{
If(right_key_is_pressed)
speed_x = SPEED
If (left_key_is_pressed)
Speed_x = -SPEED
If (up_key_is_pressed)
Speed_y = SPEED
If (down_key_is_pressed)
Speed_y = -SPEED
}
